

Elsa from Disney شبیہ I've made with this 5-STEP-Required tutorial
First of all, although every in Adobe Photoshop the tools placement are different, but the tools I'm using are common and I hope آپ already know them. But don't worry, I also include the tools' shortcut. In this article, I'm using Adobe Photoshop CS5.
Let's begin!
STEP 1: Choose a picture آپ want.
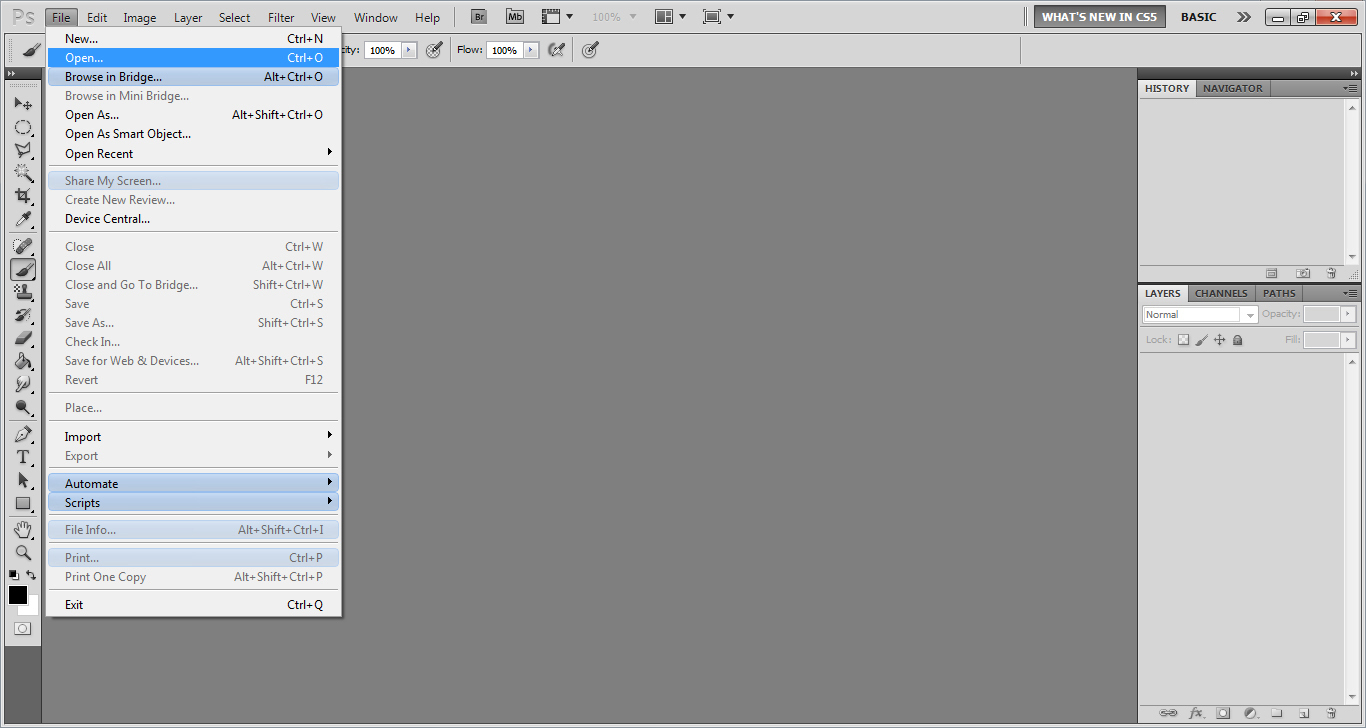
How to open an image: click 'File' and then click 'Open' یا a shortcut CTRL+O. آپ can use any image from your computer.
STEP 2: Adjust the image آپ use.

In order to make your شبیہ مزید beautiful, add your image's brightness یا contrast سے طرف کی clicking 'Image' then click 'Adjustment' and click 'Brightness/Contrast'. It is up to آپ whether آپ want your شبیہ to be light یا dark, contrast یا less contrast.
Now, the colour of the image. آپ can adjust it سے طرف کی clicking 'Image' then 'Adjustment' and 'Hue/Saturation (CTRL+U)' یا 'Color Balance (CTRL+B)'. آپ can adjust it into whatever آپ like.
STEP 3: Crop the image using 'Crop Tool (C)'
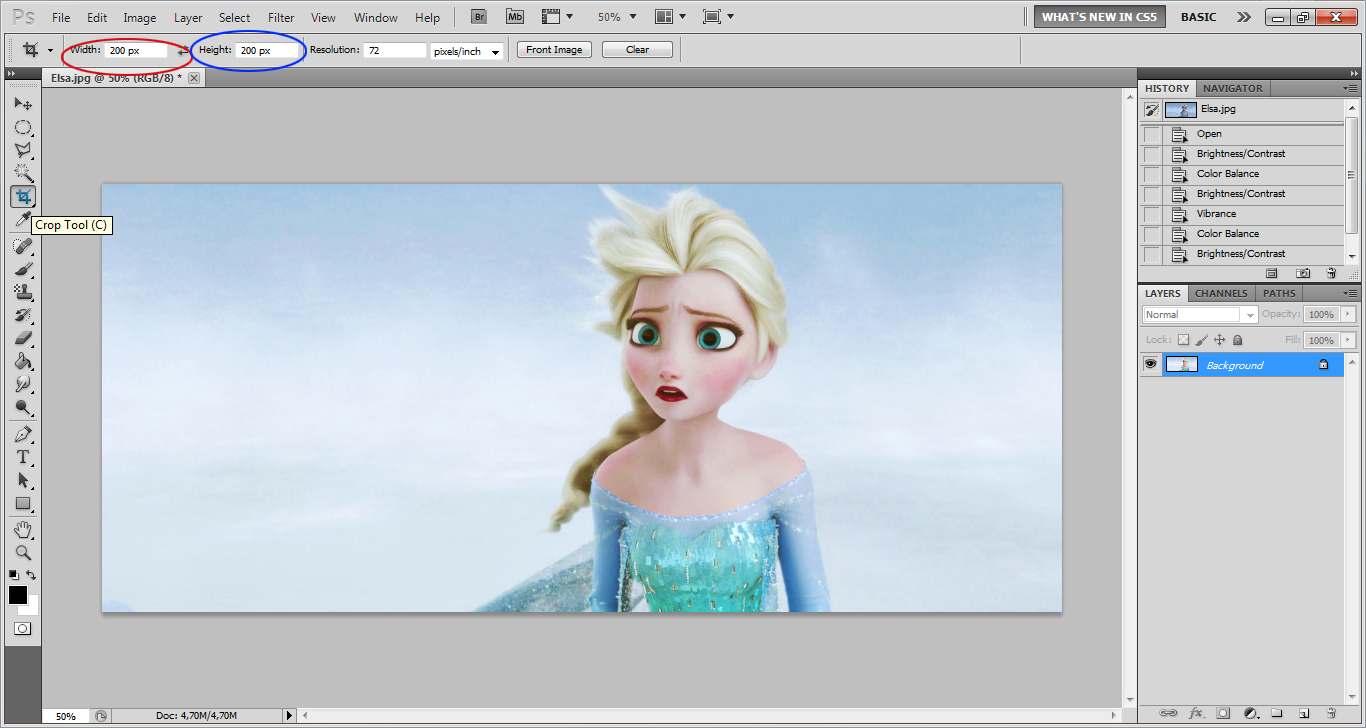
Next, آپ have adjusted your image, it's time for آپ to crop it square. Click the box besides 'Width' then write down '200 px'. Do exactly the same thing to the right box besides 'Height'. آپ can write any size آپ want actually, but we are making an شبیہ now and I usually create a 200x200 px sized icon.
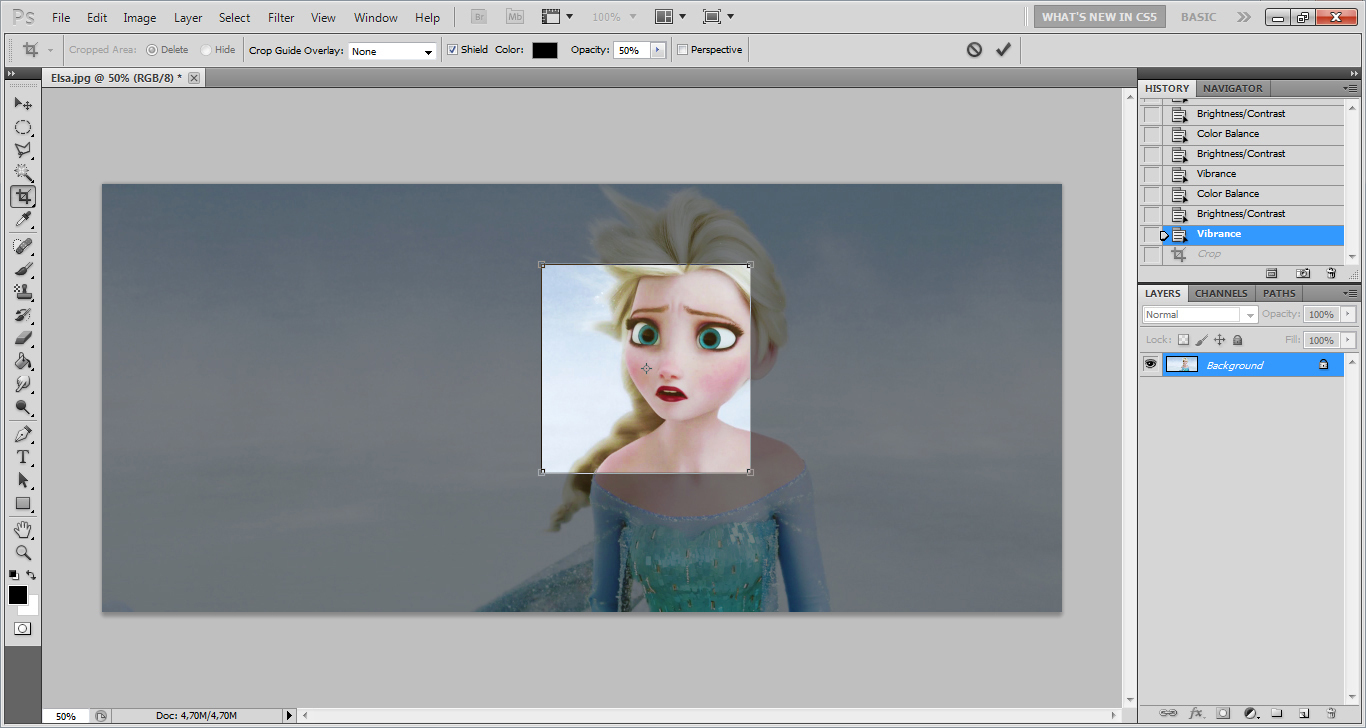
Drag your ماؤس یا mousepad to crop it. آپ can use the keypad too to اقدام the cropped area.

Cropped
STEP 4: Decorate your icon!
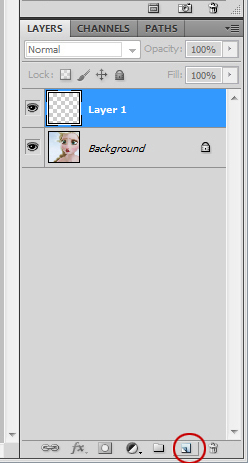
Add a new layer سے طرف کی clicking 'Create a new layer'. Click 'Layer 1'. That means آپ are going to fill that layer.
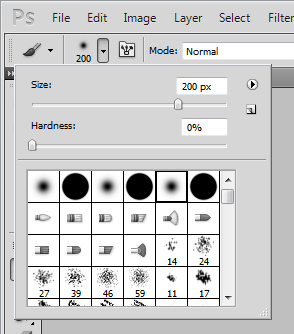
Then click 'Brush Tool (B). آپ are able to change the brush's size/hardness and even into other shape. آپ can download new brushes in the internet. Don't get mistaken with 'Eraser Tool (E)'.
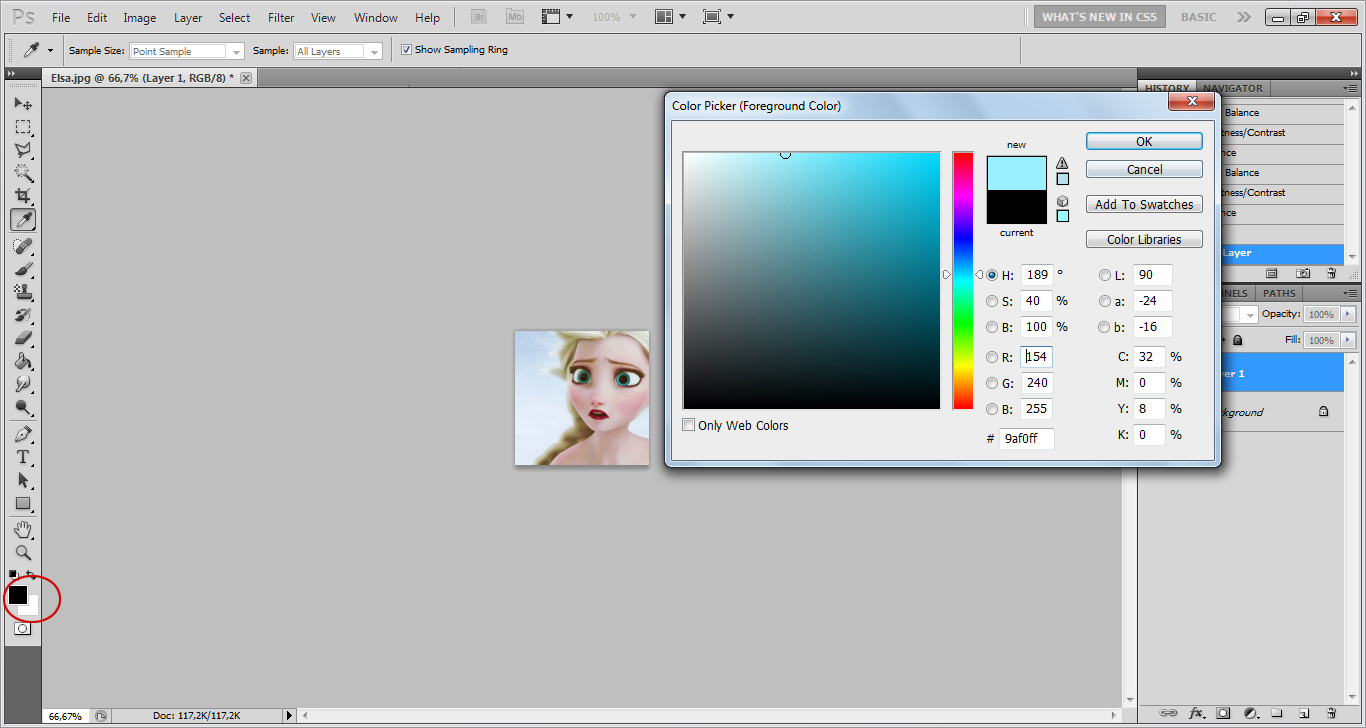
Change the brush colour too into any colour سے طرف کی clicking 'Set foreground color' as آپ like یا even the brush's shape into other form.
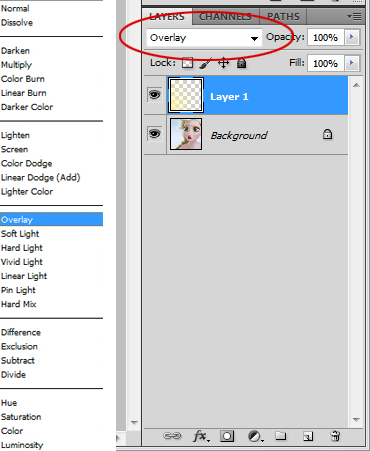
Then click the left button of your ماؤس یا mousepad to add colour on your icon. آپ can change the mode of the layer into 'Overlay', 'Hard Light', یا anything آپ like.
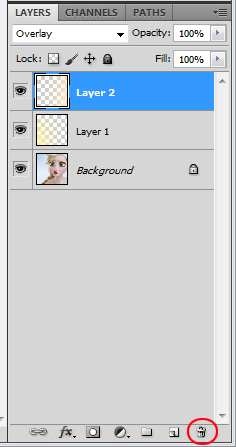
آپ can add another layer, add brush into your icon, and also change it's mode. If آپ don't like it, آپ can خارج the layer سے طرف کی clicking the 'dustbin' button besides the 'Create a new layer' button.
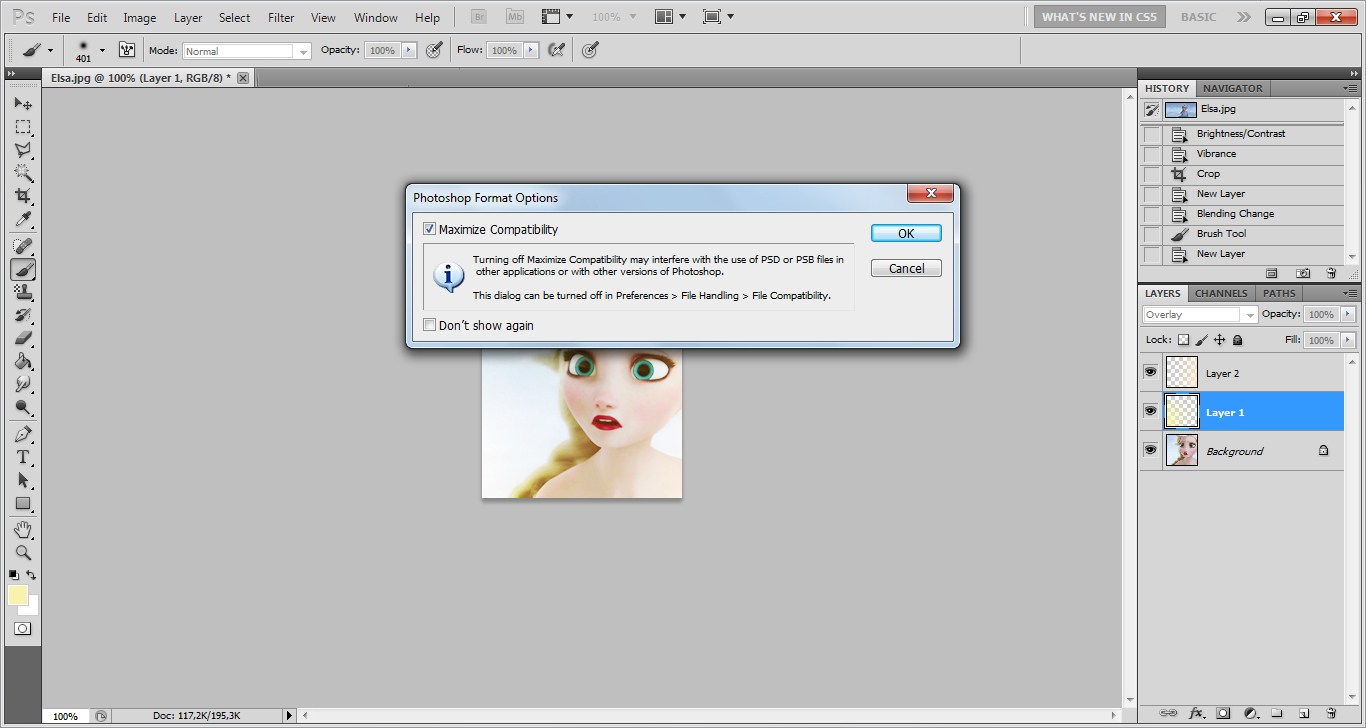
Save your icon. It's format will automatically turn into PSD.
STEP 5: Flatten your شبیہ and change it into JPG یا PNG format.
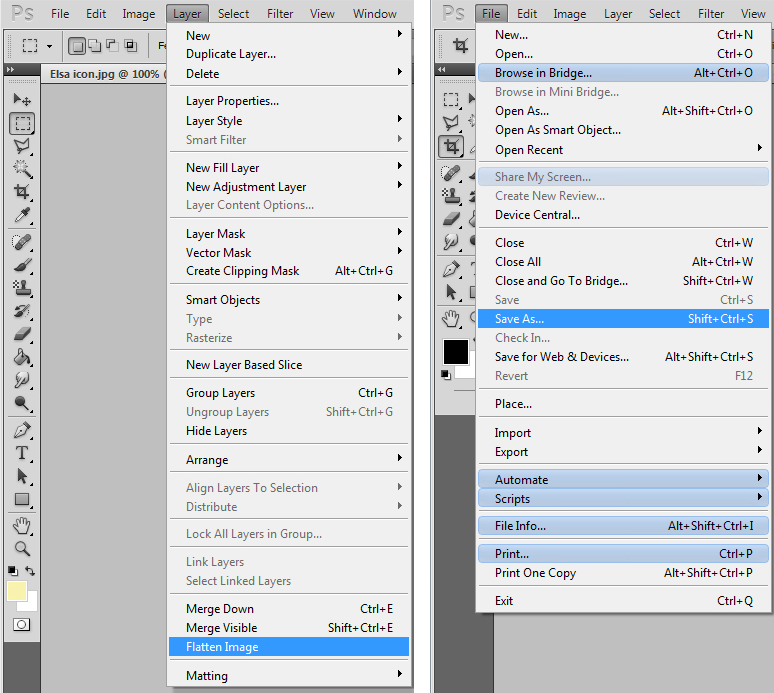
After آپ have satisfied with your decoration, flatten your شبیہ سے طرف کی clicking 'Layer' then 'Flatten Image. Then click 'File' and then click 'Save as... (SHIFT+CTRL+S)'. Change it's format. آپ can change it into any format that are available in your Photoshop. تصاویر are usually formatted JPG یا PNG.

Do NOT save your شبیہ after آپ have flattened it. یا else, آپ will lose your added layers and it will be harder to re-edit in case آپ want to.
*note: I added 'Vibrance' in my icon. Older versions from Adobe Photoshop CS5 have no 'Vibrance'. But that's no big deal to make your شبیہ lovely.
So, that is my secret on how to make a lovely شبیہ in an easy way! Try it and be as creative as آپ can!